Adobe Audition 2.0
as Audio Editor Review
 click to enlarge
Does it still make sense to use
Adobe Audition 2.0, the
now fully
fledged multitrack recording program as a sound
editor?
Cool Edit Pro, the predecessor of Adobe
Audition 2.0 was known as an excellent sound editor. We want to know if
this is still valid these days.
Since the beginning of digital
recording, the rule of thumb was, that good multitrack recording programs
seldom have top sound editors. The were usually much too slow and
resource heavy and lacked essential functions too be a first
choice for sound tweaking.
Do you open Adobe Photoshop when you
just want to watch a picture? Probably no and even when you just have to
perform a simple edit, you might be better off with a simpler and smaller
program.
Adobe Audition 2.0 is a rather big
program but it starts up in around 14 seconds and it loads a session in
another 10 seconds. If you don't need a multitrack session its even
faster. Loading a sound is lightning fast.
So, from it's overall handling it
hasn't changed too much and it still qualifies for quickly editing a
sound.
The
Edit Window Displays of Adobe Audition 2.0
There are four different views in the
Edit Window now. The following pictures show a stereo track of Toms to
demonstrate all available views.
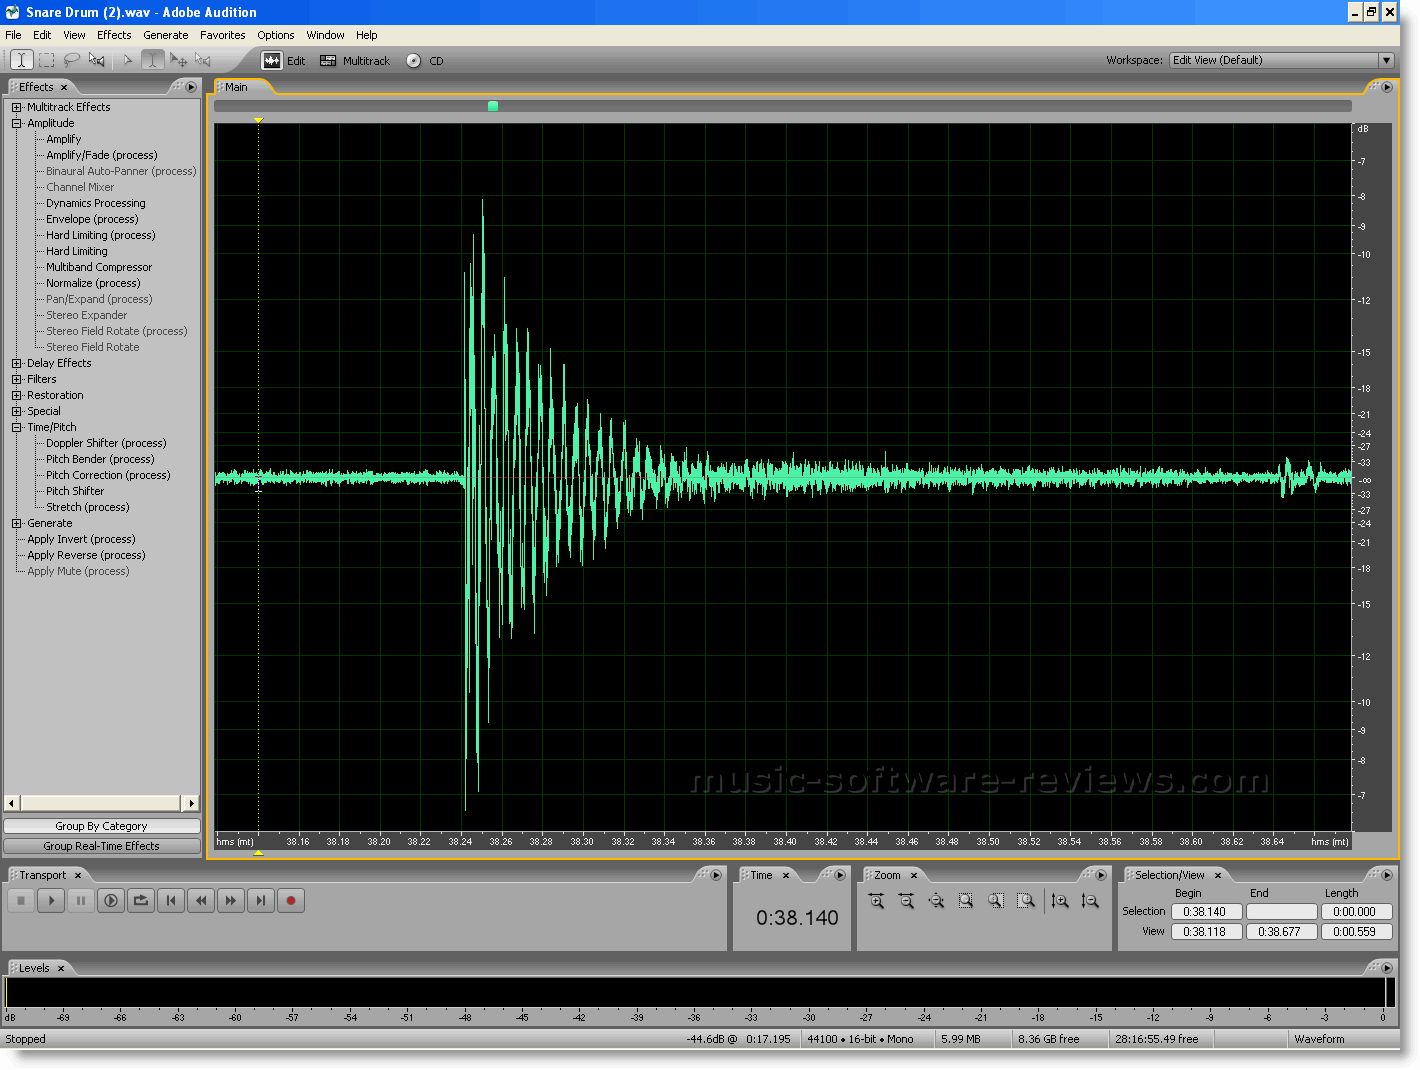
This is the usual Waveform Display,
no big surprise:
 click to enlarge
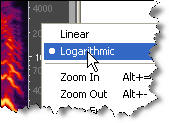
Display options for the vertical scale:
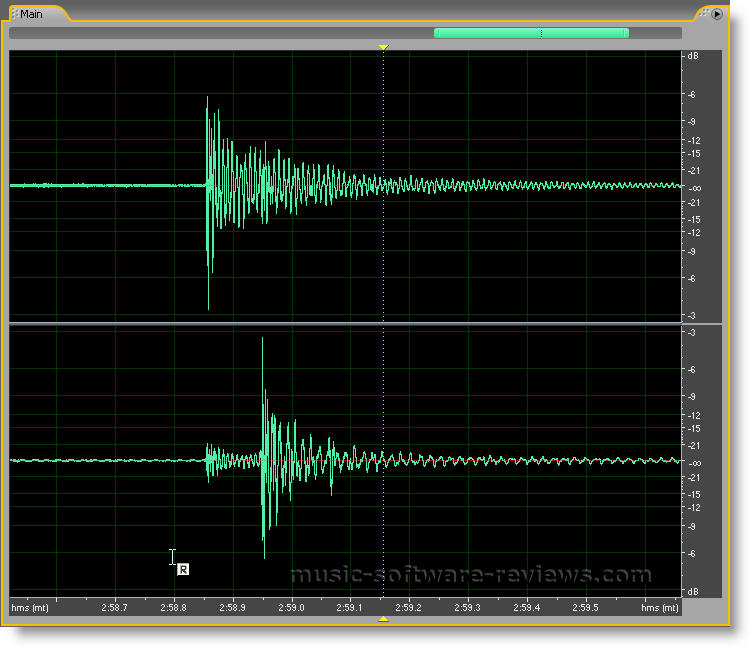
Next comes the same Tom stereo track in the Spectral Frequency Display.
On the right sight of the display in
Adobe Audition 2.0 you
can see the frequency scale from zero to 20kHz. The color shows the
intensity of that frequency range. Bright means high and dark means low
intensity (You can also edit the colors if you want).
In the picture below, this means that
the frequency range of this tom sounds go up to 14kHz with most energy
in the low frequency range.
 click to enlarge
Display options for the vertical scale:
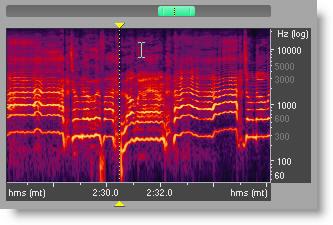
The logarithmic scale makes sense
if you want to see a melody like in the example below. The lowest bright
line is the basic tone of a male lead vocal line.
And for stereo tracks like this, you
have two more options:
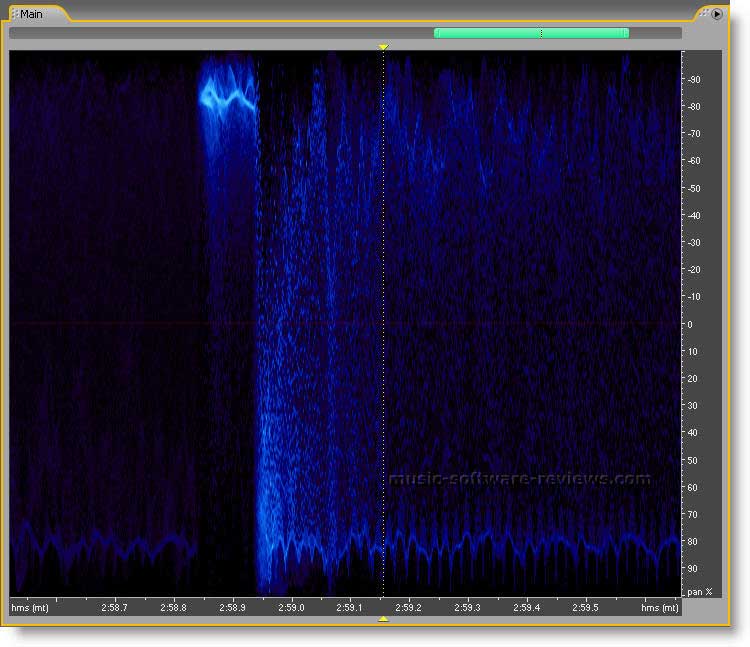
The Spectral Pan Display lets
you find the exact actual position of a sound in the stereo picture. The scale
on the right shows you this in % left or right.
 click to enlarge
Display options for the vertical scale:
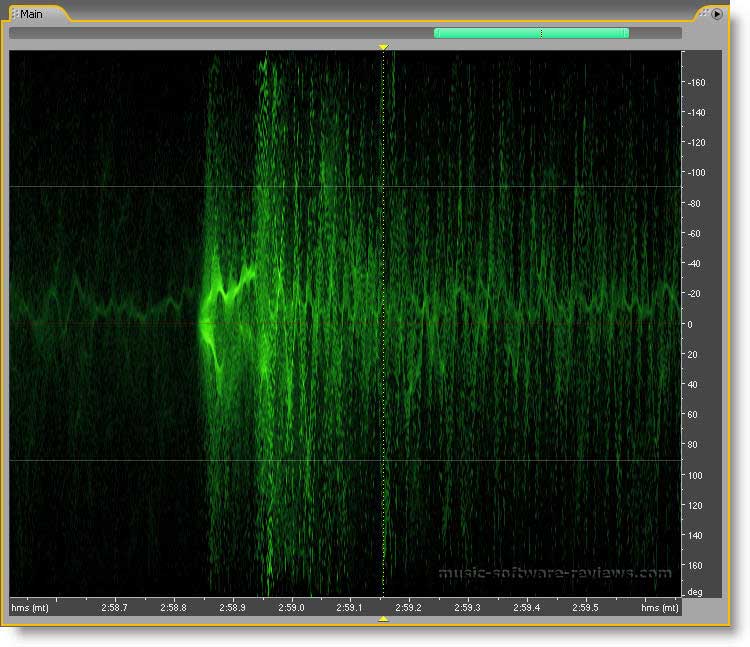
The Spectral Phase Display is
quite useful to determine if a sound is in or out of phase. The two
white lines are the 90 degree margin. If a stereo sound is beyond that
line to a marked degree it could have some unwanted effect on it's
stereo image (unnaturally wide) or sound strange when played mono.
If a sound is totally out of phase you
see two bright lines near the 180 degree margin. If it's totally in
phase (mono) you see a bright line in the middle.
 click to enlarge
Display options for the vertical scale:
You have also options for the
horizontal scale, the time format:
A very interesting option is the 75fps
Compact Disk setting. This shows you where you can set index points in a
CD.
How to
set markers in Adobe Audition 2.0
A marker labels an exact point (sample)
within a sound file. You can give it a name and description. In Adobe
Audition you can set five different markers. As all of them can be set
as points as well as ranges, there are actually ten different markers.
- Two types of cue markers. One for
defining ranges (which are actually two markers) and another for
defining locations.
- Beat marker are set to define the
beginning of a percussive sound like drums, percussion or similar.
- Track markers are used only to
define the beginning of tracks for CD burning.
- Index markers set index points in
CDs.
- BWF-j markers are used for
specifying marker points for Broadcast Wave files for the Japanese
broadcasting environment.
You can always change the type of
marker with this drop down menu in the Marker List.
The easiest way to set a marker in
Adobe Audition 2.0 is by
pushing F8. Just make sure that the play cursor is at the right
position while pushing the button. You can also set them on the fly
while playing.
Another way to set markers is by the
Auto Mark Functions. This is used mainly for identifying beats
within loops or to find phrases or songs in a long file and mark them.
I was not very satisfied where Adobe
Audition sets it's Beat markers. I tried some tweaking but it was often
around 26 samples too early. Maybe there's a setting where you can
change this behavior, but I couldn't find one.
Well, you might say 26 samples is not
even a millisecond and this is nothing to care about. You're probably
right. I just don't understand why this happens.
By right clicking the little triangle
of a Marker, the following dialog box opens up and gives you instant
access to these important actions.
How to
make selections in Adobe Audition 2.0
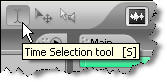
The most
intuitive way to make a selection is of course by
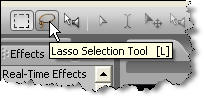
-
choosing the selection tool
- left
clicking at the starting point
-
dragging to the end point

-
releasing at the end point

Attention! While doing this, you have to take care, that you really
select both channels of a stereo sound file in Adobe Audition 2.0. If you are too far at the
upper or lower margin of the edit window, a small L (for left) or R (for
right) appears at the cursor to indicate, that you've now selected only
either the left or the right side.
By
shift-clicking you can change either the beginning or the end of the
selection.
You can
also set a different behavior in the preferences.
If you
choose the "extend selection" option, shift-click and right click
produces the same result. That can be very handy if you don't need the
right click Popup Menu.
If you
don't make a selection, per default the whole file gets processed though
no selection is visible. You can also change this in the preferences to
the visible part of the sound file.
If you
double click within the edit window, the visible part of the file gets
selected.
Well,
how else can you define a selection? What I often need is to drop
some markers at exact points in the sound file and then selecting the
range between them for processing.
At some
editors you can just double-click between the markers to select the
range between them. With Audition it's a little more complicated, but
also quite easy to perform.
After
dropping your markers you can select them in the Marker List window and
apply "Merge Selected" to it.
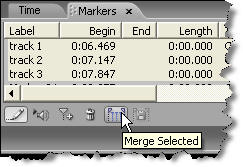
That
means that the space between them is now defined as range and by double
clicking the marker in the Marker List, you select its range for
processing.
Another
way to perform the trick of selecting the audio exactly between two
markers, is to turn on the "snap to marker" option.
Actually
it's turned on per default so don't turn it off.
Now you
can click at, or very close to a marker and drag the right margin of the
selection to the next marker. It snaps to the exact sample value of the
markers and your selection is made.
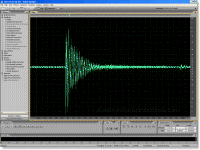
Cut, Copy and Paste
Even if you cut a selection Audition tries to prevent clicks by
making a short crossfade. I cut out the white selection and you see the
result below.
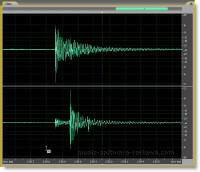
Result
You can see the short crossfade instead of an almost vertical line.
A very good thing about Adobe Audition is it's clipboard. You
can use the Windows clipboard and five extra clipboards from Adobe
Audition.
When pasting audio clips into a sound file, Audition makes also a
short crossfade to prevent clicks. What's strange however is that the
crossfade time seems to depend upon the length of the pasted sound file.
But in practice this works quite well.
You have also options when you paste a sound.
You can choose between the paste, paste to new and
mix paste function. Paste just inserts the range at the cursor
position. Paste to new makes a new file with the clipboard content and
mix paste let's you choose from the following options.

What I really miss in Adobe Audition is a nondestructive Playlist
where you can dump your pieces (selections, sections,
regions,...however you name it), and then play around with the sequence,
different cross fades, tweak the cut points etc...
Of course you can transfer those pieces to the Multitrack view of
Adobe Audition 2.0 and
arrange it there, but if you've ever tried to cut mixes that way, you
know that it's not the same and you easily loose control.
Frequency Space Editing
Adobe Audition 2.0 has brought up this kind of editing.
This is something really new and just at it's beginning. You can realize
things quite easily that would have taken hours and quite some equipment
before.
The principle is simple. You can apply any effect but only in the time
and frequency range selected.
To apply effects only in the time range selected is nothing new. You
draw your selection in the waveform view and apply the effect you want
only within that selection.
That stays the same when you edit a sound file in spectral frequency
view, but there's an new dimension added now. You can also specify a
vertical range that means the frequency range that gets affected by your
operation.
As you can do that not only by a rectangle but also with free form
shapes using the lasso tool, the frequency range affected can wildly
vary as time goes on.
What can you do with it?
Well, besides restoring audio by identifying and erasing noise or other
unwanted sounds, a wide field of experimentation opens up here.
Think of a vocal track and adding delay just to specific overtones of
that voice and another delay to other overtones. Or pitch shifting just
part of the frequency spectrum of the voice.
Or applying reverb to a certain frequency spectrum of a snare drum.
Possibilities are endless especially for creating interesting, never
heard effects with ease.
How do you start experimenting?
- Take a sound file (I started with a vocal track)
- Switch to Spectral Frequency Display (shift+F)
- Right click at the scale on the right side of the window and
select the logarithmic scale.
- Make the following settings in the preferences to better see what
you are doing.
- Choose either the rectangle or the lasso selection tool
- Make a selection within the sound file
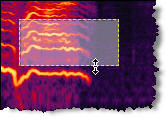
- Apply an effect (for the beginning it should not be a subtle
effect but something you will notice). I applied "delete selection" in
the example below.
 You
see that the specified frequency range is just filtered out almost
completely from the sound. You
see that the specified frequency range is just filtered out almost
completely from the sound.
- Listen how it sounds and how sound changes when the cursor enters
the processed area.
That was just a crude example but you get an idea of what happens here.
Continue with applying other effects on other frequency ranges and you
will soon produce unbelievable new sounds.
Applying Effects in Adobe Audition 2.0
Here you can see all the effects that come with Adobe Audition 2.0
grouped in categories at a glance. The grayed out effects are only
applicable at stereo tracks.
You can also group them in "Real-Time" or "Process" effects. Though the
VST effects are labeled "Real-Time" they can also process a sound file.
I do not write about every single effect here a this would be beyond the
scope of this review, but you should get a general feeling about the
quality and handling of the effects.
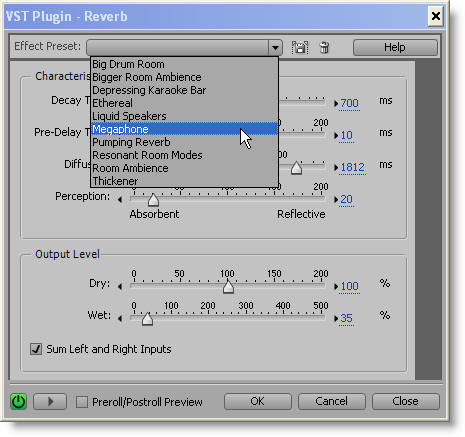
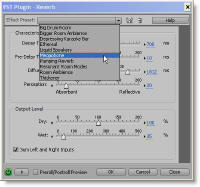
A typical VST or "real time" effect would look like this:
 click to enlarge
You have the presets in a drop down menu, a save and a delete preset
button and the help button on top.
A bypass or "power" switch, play button, and a checkbox for Pre- and
Postroll Preview at the bottom. Once you have selected a button, you can
toggle it on/off with the spacebar.
The design is very simple. No 3D racks and no blinking buttons but very
useful for everyday work.
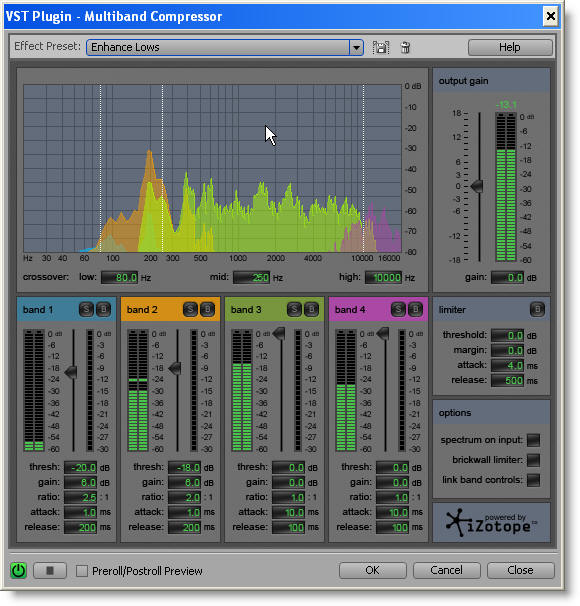
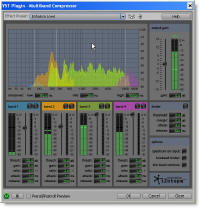
There is one module that looks a bit more sophisticated, the new
multiband compressor. But even that plug-in uses color in a very
useful way and not to impress your graphic designers.
Like most of the effects in Adobe Audition 2.0, also the Multiband Compressor is not top notch
but quite useful. I wouldn't use it to master a track that should have
maximum power with minimum loss on clarity.
There are better plug-ins for that purpose like TC Electronic's
finalizer plug-in MasterX or Wave's C4 multiband compressor. But if you
know what you're doing and combine it with other plug-ins it can be
quite a tool.
 click to enlarge
Most of the "process" effects look even simpler than the VST
effects. But what do you need for simple task like normalizing?
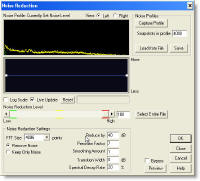
Beside the "standard" tools for the daily work, there were some plug-ins
that need to be mentioned in Adobe Audition 2.0. One that positively surprised me, was the
noise reduction. While you can pay a lot for some plug-ins that let you
fight with settings and unwanted artifacts, this one gives you a lot of
bang for the bucks.
You just capture the noise reduction profile from a little sample of
noise and than you can start the noise reduction process. It works very
clean with very little strange artifacts.
 click to enlarge
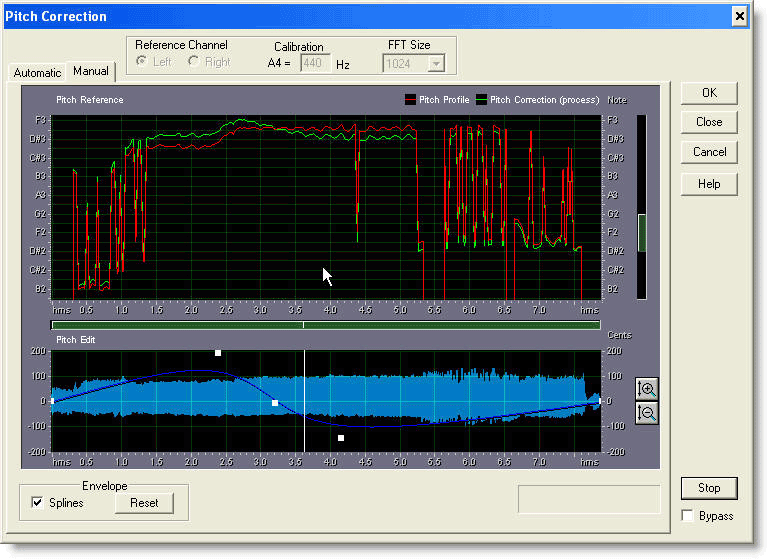
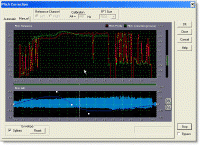
Another effect of Adobe Audition 2.0 that stands out of the crowd is the pitch correction. While
the automatic mode is just average, the manual mode lets you change the
pitch in a very useful way.
If you look at the screenshot below, you see a red and a green line in
the upper display. The red line represents the pitch of the recording as
it is and the green line shows the pitch after pitch correction.
The correction is done by a curve that you draw in the display below.
See the blue line, that can be bent in order to change the pitch.
If you check the "splines" checkbox, you can draw smooth curves, if you
uncheck, you draw straight lines between the white points.
The only drawback and the reason you can just make subtle corrections
is that formants are not preserved. That means you get the well known
"Mickey Mouse" effect if you pitch high and the "Frankenstein" effect if
you pitch low in
Adobe Audition 2.0.
 click to enlarge
A tool that really flubbed in Adobe Audition 2.0 was the clip
restoration tool, that is expected to repair clipped recordings. I
could not make one repair that sounded better than the clipped file, so I
had to classify it as totally useless.
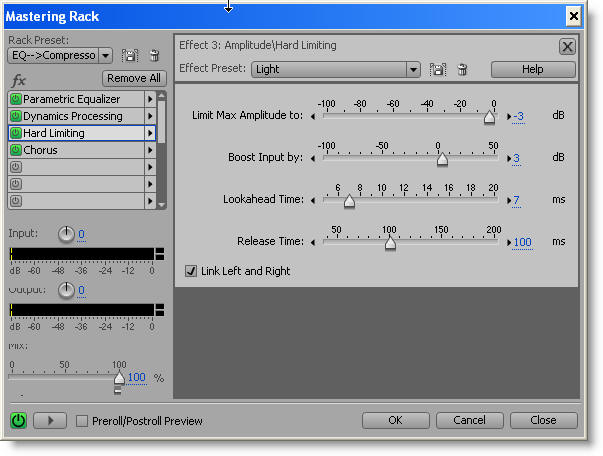
The Mastering Rack of Adobe Audition 2.0 lets you apply effect-chains of up to 16
different VST or DirectX effects. You cannot use "Process" effects here.
That means that you have to apply process-effects like pitch correction
or the noise reduction separately.
 click to enlarge
Summary of the built in effects:
The effects that come with Adobe Audition 2.0 let you perform most of
the tasks that you would expect from a professional Sound Editor.
Some of them are better, some are worse, but most of them are pretty
average stuff. So, if you really want to work with the best plug-ins on
the market, you have watch out for third party offers.
Which third party plug ins are now supported?
With Adobe Audition 2.0 you can use VST and DirectX plug-ins. As most
plug-ins are available in both flavors, I would seek for maximum
compatibility with other programs. If in doubt choose VST because of a
slightly better handling.
It is not difficult to implement the VST and DirectX plug-ins you own.
Just tell Adobe Audition where they are, refresh the effects list and
off it goes.
Undo
Once you applied an effect you may want to undo it.
Well, if you haven't checked the Enable Undo/Redo function in Adobe
Audition 2.0, you have to
reload the original file.
In case you want to undo all your processing at once, click the
revert to saved option. This loads the original file again and you can
start over.
Crashes
If the system has crashed, it asked me at the next start if I want to
continue the session or not. This is a convenient feature that let's you
save most of your work in case of a crash.
Crashes of Adobe Audition 2.0 were quite common, especially when I was testing CPU
hungry plug-ins, so this function was quite useful.
Help
Adobe Audition 2.0 has a new help file. Actually it's the new "Help
Center". It fits to the Adobe product line now and looks way better
than before.
You can also get help from Experts by buying a support plan.
But you will probably come along well without it, because the Adobe
Audition help is not only an emergency rescue, but more like a tutorial.
Not only for Adobe Audition but for tweaking audio and recording in
general.
It has also a very useful glossary for digital recording terms.
Also the search function always got me what I was searching for.
Wish list for future versions
Though Adobe Audition 2.0 boasts a lot of functions, there's still
room for improvement. Especially because the look and feel of that
software is such a pleasant experience, one would like to see all the
functions implemented, that we need to make life easier.
1. Adobe Audition 2.0 is certainly one of the best Audio Editors
around. There's just one thing I'm still desperately missing and what I
consider as a "must have" in a sound editing program. A separate
overview of the whole sound file. It's so much easier to work if you
always see where you are in a sound file.
Therefore, my single biggest wish for version 2.5 would be a second
display of the whole file you are working on with a cursor where you are
now, a visible selection of the section displayed in the main window,
and maybe also visible markers or defined regions of the file.
2. The other thing a professional sound editor should have (in my
humble opinion) is a window with a undo history. Though you can
undo any step until you saved the file it's not very comfortable without
a separate list of all the actions performed, like in almost all other
Adobe programs.
3. Adobe Audition 2.0 could be better integrated with the Adobe family because of missing
Surround functions that Adobe Premiere already
has implemented.
4. I would like to have a nondestructive Playlist for
rearranging tracks or pieces of them, defining cross fades, setting
cutting points etc...all that you need for final arrangement of songs or
cutting mixes.
Conclusion for using Adobe Audition 2.0 as an Audio Editor
Though Adobe Audition 2.0 boasts a lot of functions, there's
still room for improvement. Especially because the look and feel of that
software is a pleasant experience, you don't want to change the user
interface for other tasks.
But the naked truth is that you cannot do everything with Audition as
with any other program to date. You could however use it as a host for
your VST or DX plug-ins if you like the user interface.
It is well suited for tweaking or batch processing sound files for
music or multimedia purposes.
I would not recommend it as software for professional mastering and
CD creation there are just too many functions missing (see above).
As it goes more into the direction of a multitrack recording program
it seems to be a bit heavy for using it just as a sound editor.
To see how it performs against it's competition, take a look at this detailed
comparison chart of the best sound editors.
It gives you an instant overview about all the functions and features of
this kind of software.
|